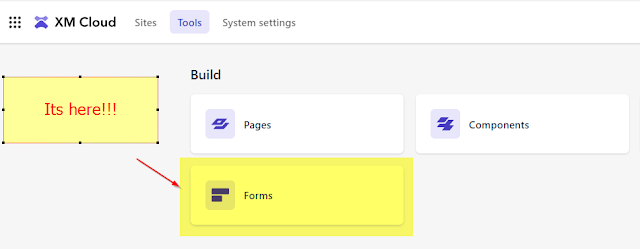
In this article, I'll demonstrate the process of configuring a submit action in XM Cloud forms. As you're aware, Sitecore XMC forms have recently been released, featuring a range of functionalities including setting up webhooks and assigning them to forms for data submission. Moreover, the introduction of a test webhook functionality allows for seamless testing of form webhooks to ensure successful connections. Excited to learn more? Keep reading!

One of the important areas in XMC Forms is the ability to manage and test webhooks and then configure your submit button to submit forms data into the webhook configured, as you can see from the above screenshot, forms is now available through the dashboard, once you click on it, you will get into a table where all forms are displayed is available, where users can activate forms, delete forms, and add labels for better management of the forms, once you choose your form, you will see a settings icon at the top of the page, as you can see from the following screenshot:
Once you enter the settings section, you can see the choose webhook area, there is a link below called Managed Webhooks where you can enter the webhooks area, in which you can add, edit and delete webhooks, as you can see from the following screenshots:
Notice that you can choose your authentication type, depends on the API/webhook you're planning to use, you can choose oAuth2, Basic, API Key or No Authentication.
Once you add your webhook in the manage webhooks section, you can choose that as a webhook to be triggered/called when your form is being summited.
Another cool functionality you can find in the settings/Choose webhook section, is the ability to test your webhook, all what you need to do is to click on the Test Webhook button under the dropdown where you selected your webhook, you will get a popup that show your form, where you can test and submit to the webhook, see the following screenshots for more information:
After you fill in your form and click submit, you will get another popup window, where XMC forms show you the payload that will be sent to your webhook in JSON format, in addition to the request headers that will be sent, isn't that nice! :) see the below screenshot:
Hopefully you enjoyed this post and got some useful information out of it!


No comments:
Post a Comment